It’s early 2016, and my employer comes up with a scheme that can help us purchase a laptop and spread the cost over 12 months. For those of us in the UK, it is managed by the same company that also do the Cycle To Work Scheme vouchers etc.
At the time, I had a capable but old MacBook Pro (2011 I believe), so the temptation of an upgrade was too great, and I jumped at the opportunity for a shiny new retina MacBook Pro (Early 2015). As it turns out, they were just drop-shipping the standard builds, which meant any customisation (upgrading the RAM etc.) was out of the question. Entry-level 128GB SSD, 8GB RAM it is then!
With only 128GB of disk space, I quickly added a Transcend JetDrive Lite to the machine, which sits flush in the SD card slot on the right-hand side. This doubles my usable space, but is a second-class citizen of course, as it’s inherently slow. Whilst at home, I also have a USB dock connected which has a couple of external hard-drives connected, but again, suffer with being slow.
Occasional searches every 6 months or so revealed that whilst the SSD is removable (and about the only thing that is on that machine!), any upgrades were hugely pricey due to a proprietary connection used by Apple. I believe OWC sold some upgrade kits, but they were outside of my budget.
Fast-forward to earlier this year, and my search results change. Talk of an adapter that can be used with the super-speedy NVMe SSD drives suddenly catch my eye. What followed was some late nights gathering answers to the following questions
- Does this work on the early 2015 retina MacBook Pro?
- Which adapter is needed, and where can I get one from?
- Which NVMe drive is best in terms of speed and compatibility with macOS?
- Are there any ‘gotchas’ that I need to be wary of?
A huge thread on MacRumours answered almost all of these questions, as well as raising some new ones along the way, as people started experimenting with setups.
Here is how I got on.
Step by step guide.
What you’ll need
- Retina MacBook Pro (Early 2015)
- Sintech ‘Long Black’ Adapter
- A P5 Pentalobe & a T5 Torx Screwdriver (iFixIt have a great kit, but there is a budget option)
- PCIe NVMe SSD of your choice
I picked the ADATA XPG SX8200 SSD after following the MacRumours thread intensively. Why?
- It ran fairly cool (the popular Samsung 970 series are known to run quite hot)
- Inexpensive
- Conservative with power, meaning it doesn’t affect my battery life too much
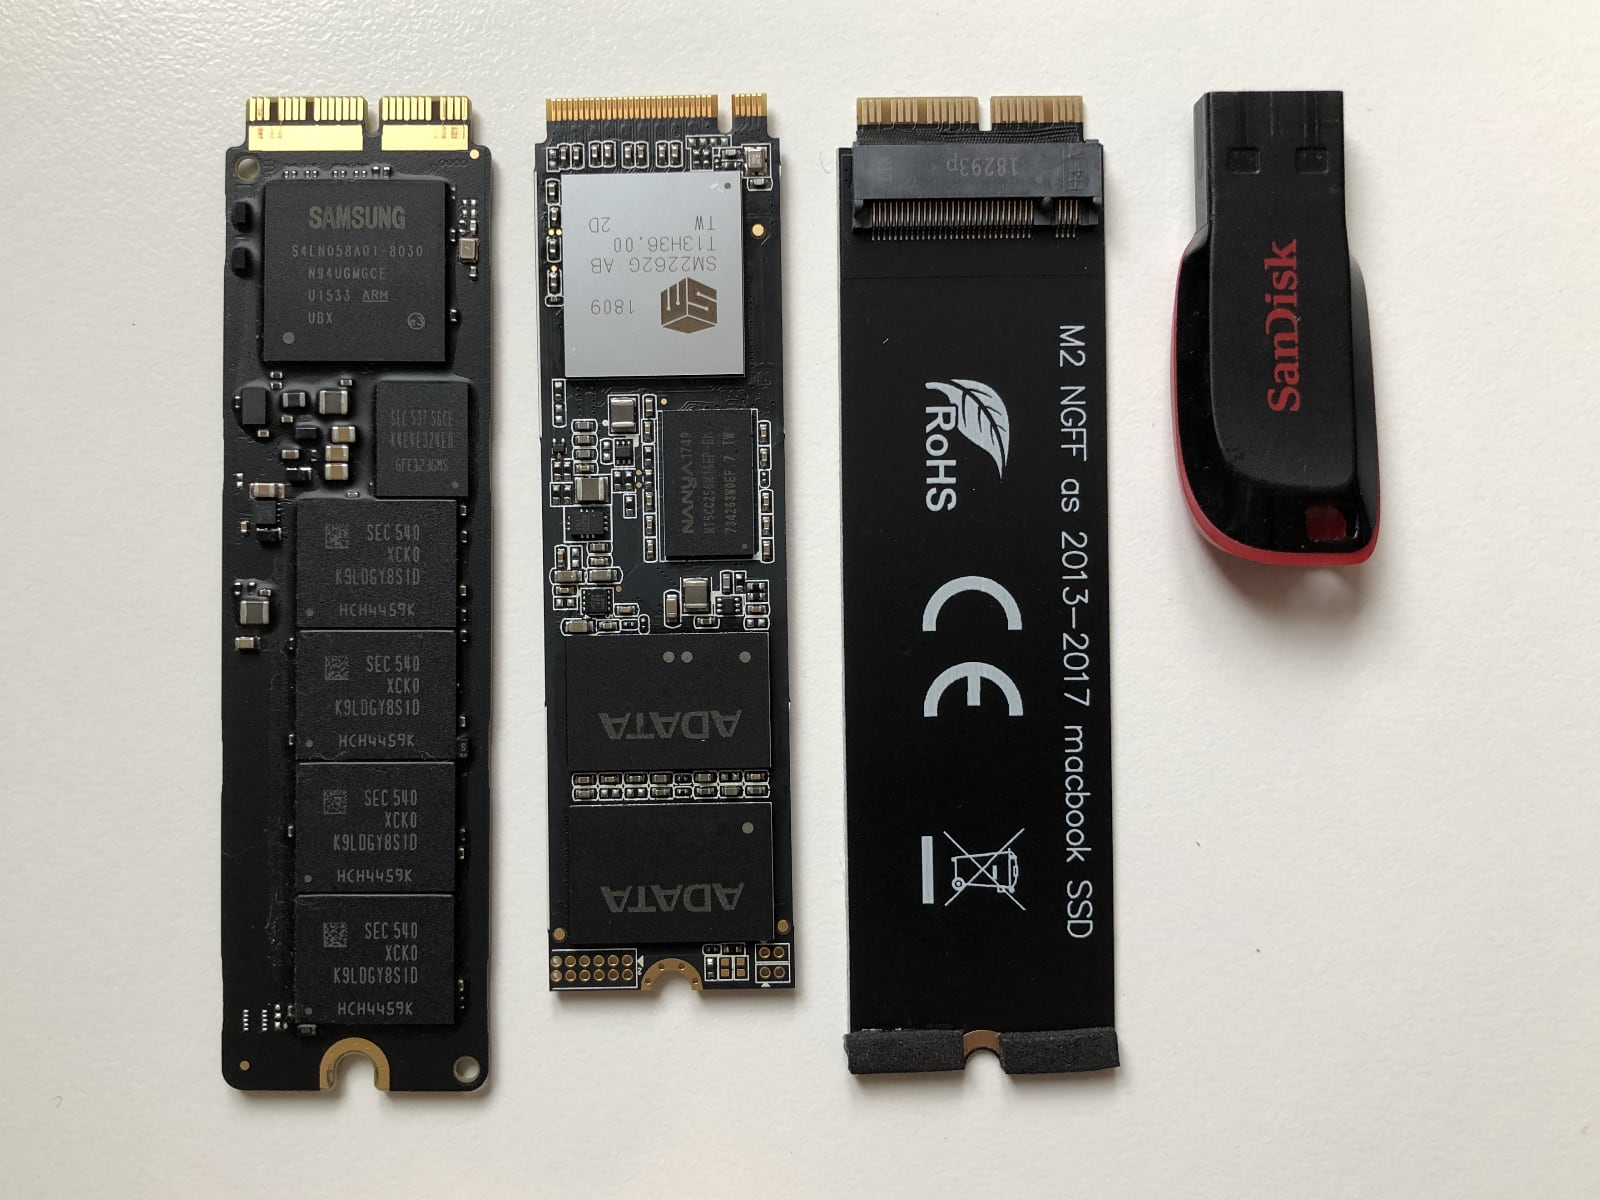
From left to right: Original Apple SSD, ADATA XPG SX82000, Sintech adapter, & a SanDisk USB for scale (and to boot from)
Step 1
Update your MacBook to the latest version of macOS available - This will ensure you have the latest boot ROM firmware loaded.
Step 2
Ensure you have a backup of your MacBook! If you’re using TimeMachine, manually run a backup so that you can be certain a recent copy exists. If you don’t use TimeMachine, use something like ‘SuperDuper!’ to create a copy of your macOS installation.
Step 3
Create a bootable macOS installer on a USB drive - We may need this to format our new SSD.
Step 4
Once you have a backup & bootable USB created, go ahead and shut down your MacBook. Once it has powered down, turn it over to reveal the bottom case of the laptop.
There are 10x P5 screws (2x 2.3mm, 8x 3.0mm) to remove from the bottom case. It is important that you track exactly where each screw came from, and that they are replaced correctly when the machine is put back together. The last thing you want to do is try and put a 3.0mm screw into where a 2.3mm once lived, and potentially damage your machine.
On my early 2015 13" MacBook Pro, the two 2.3mm screws were closest to the black screen hinge, where the fan exhausts are located.

Credit to iFixIt for their fantastic guides and photographs.
Step 5
With the bottom case off, you can now see the logic board and battery of your laptop. The SSD is located in the top right corner (with the batteries at the ‘bottom’, or closest to you).
Using a Torx T5 screwdriver, remove the screw holding the SSD in place, and pull out the original drive.
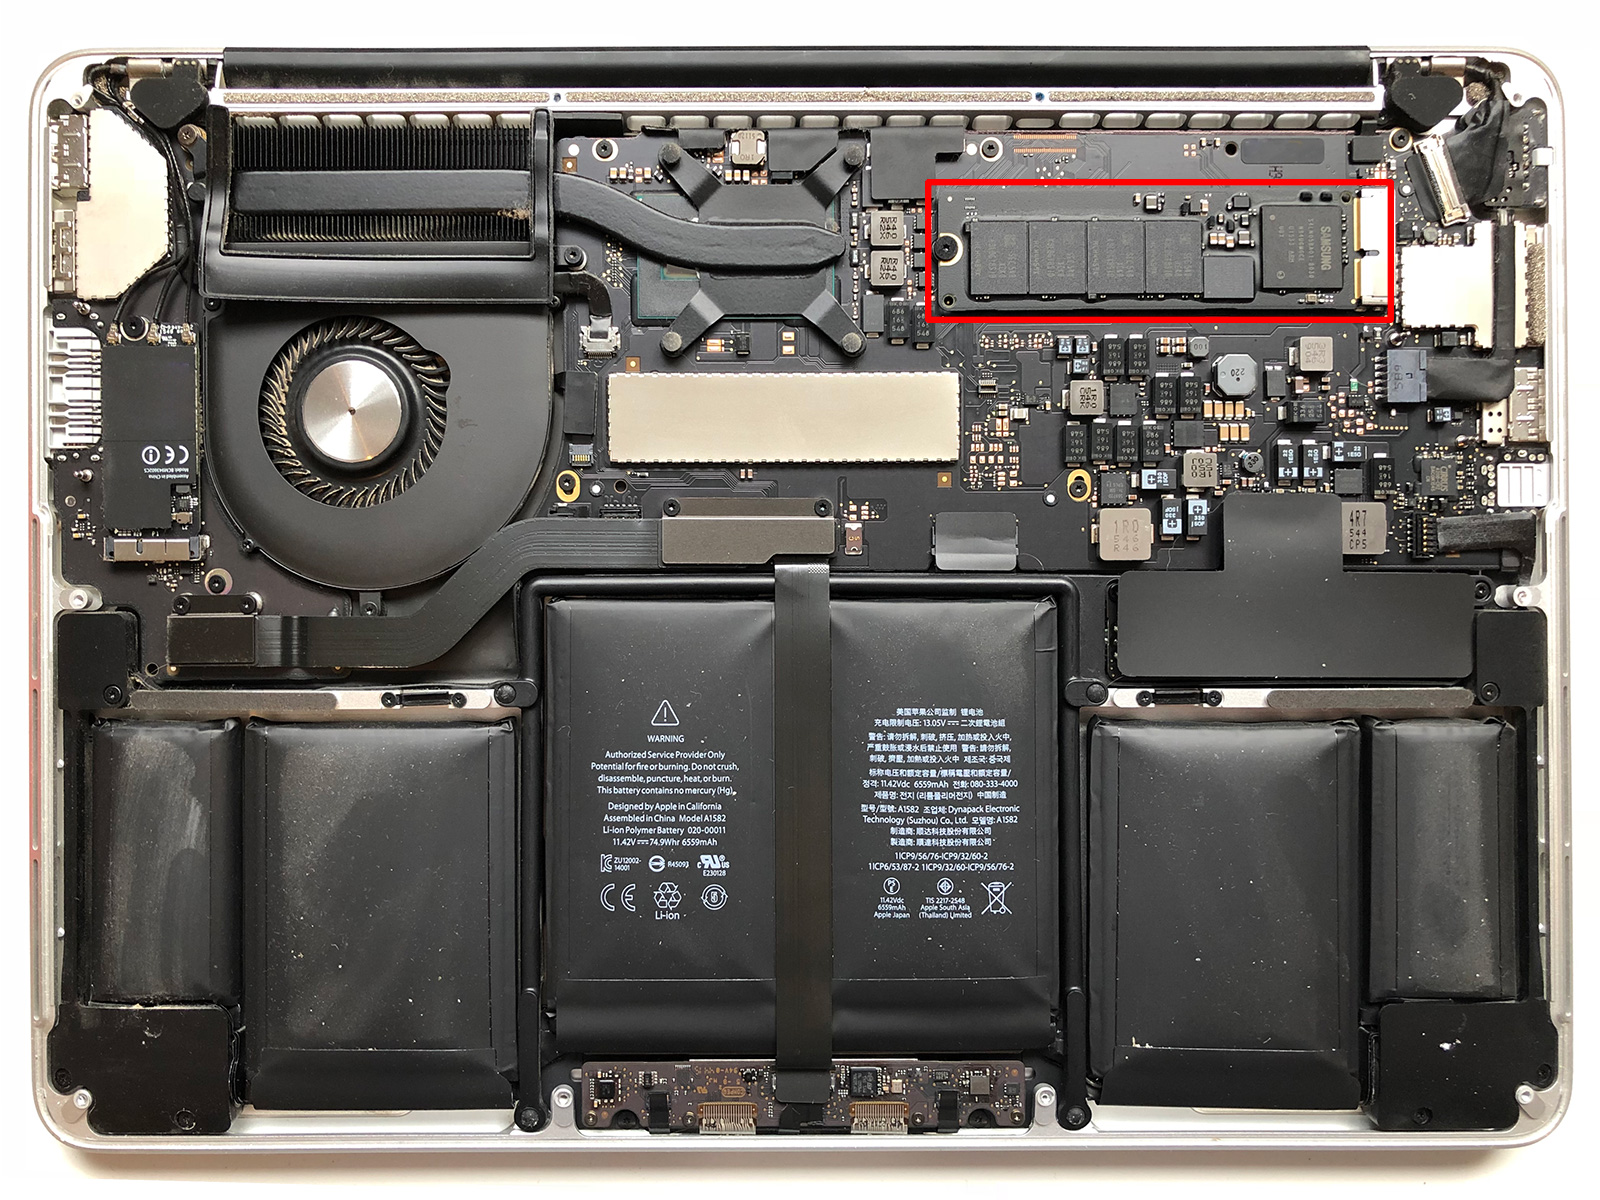
SSD location highlighted in red.
Step 6
Place the NVMe SSD of your choosing into the adapter. The screw cutout should lineup nicely between the two items.
Gently push the adapter and SSD into the empty slot on the logic board. Again, the screw cutout should line up with the hole on the board.
Step 7
Using the longer Philips screw provided by Sintech (and not the original, shorter, T5 screw used by Apple), fix the adapter and NVMe into place.
Note: Do not fully tighten the screw, and you will likely cause the SSD to bend in the middle. This may only be specific to double-sided SSDs, but it was certainly noticeable on the ADATA XPG SX8200 960GB. I loosened the screw until I found a happy medium between minimal bowing, and the screw not wobbling in the hole. Take your time!
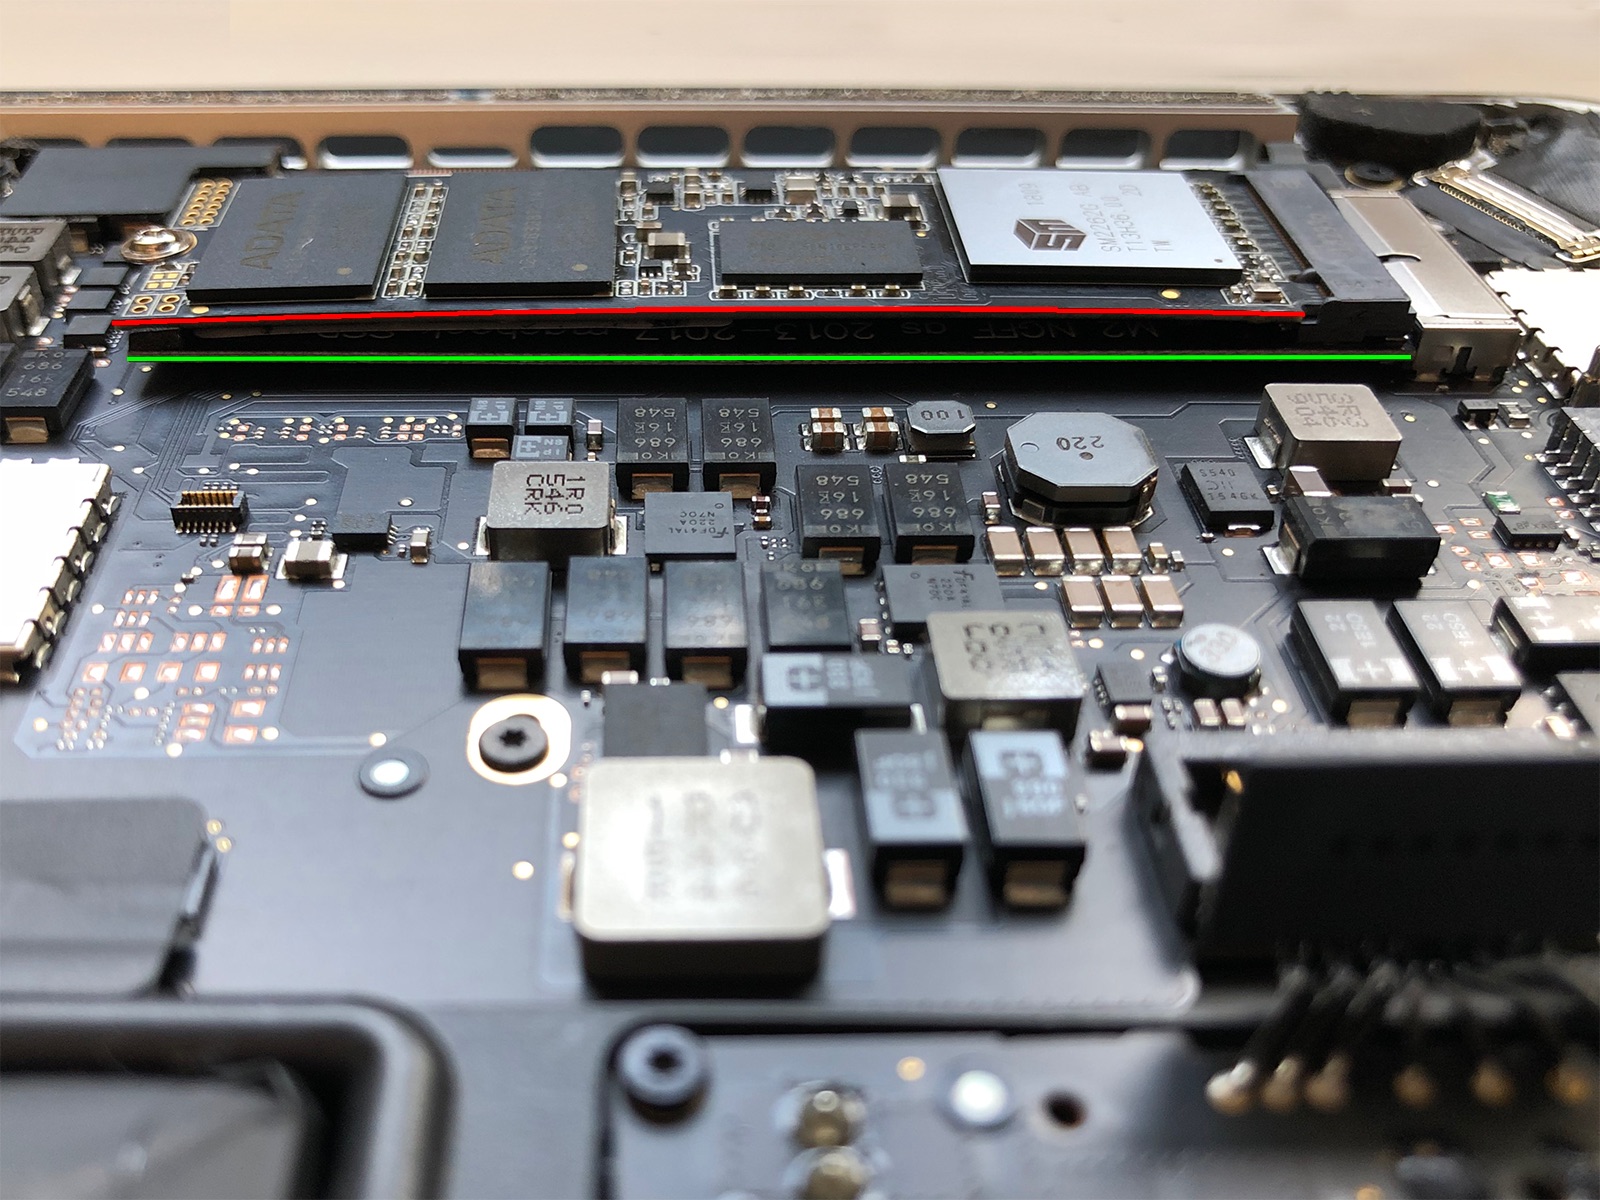
The visible bowing from an over-tightened screw.
Step 8
Replace the bottom case, remembering to put the exact screws back from where they came. Pop your bootable USB into one of the available USB ports.
Switch on the machine, and hold down ‘Option (⌥)’ on the keyboard to enter the Startup Manager screen. From here you can choose which drive to boot from.
Step 9
Once the bootable USB has loaded, select Disk Utility and format your new NVMe drive to HFS+ or APFS (APFS would be my recommendation).
You can now continue with a fresh installation of macOS, or choose to restore from your TimeMachine backup.
Step 10
Our final step, once you have a fully working installation (or restoration) of macOS, is to set our new disk as the startup disk.
Apple provide a guide for this, but simply:
- Choose Apple () menu > System Preferences, then click Startup Disk.
- Click 🔒 and enter your administrator password.
- Select your startup disk, then restart your Mac.
Et voilà! You MacBook Pro has been upgraded, and you no longer have to live with multiple external hard-drives, or worry about having a hefty VM image or two on your machine.